
The Manager by VechainStats is a browser-based application, that allows you to manage your Vechain tokens and Nodes.
It was created in a collaboration between Fabian from VechainStats and Marcel from VeSign.io. The Manager has been built from scratch to offer anyone holding assets on the VechainThor blockchain a one-stop solution to manage their assets.
The Manager is fully compliant with GDPR and there is no user data saved. The Manager respects fully users’ privacy by not saving any log files, or storing any user or session data in a database. In addition no analytics or user behavior tracking is used.
Security-wise, the application uses the industry’s best practices: it will never have access to your private key. If you want to interact with the VechainThor Blockchain it will give you a transaction to safely sign with your own wallet.
[fruitful_alert color=”alert-info”]Want to test out the Manager first? You can do this on testnet!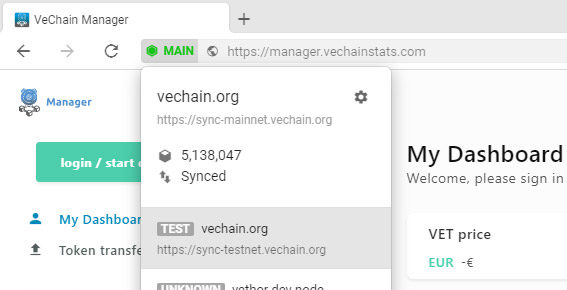
Using the switch location in the address bar of Sync you can connect to different Thor Nodes. A Node running Testnet can located at https://sync-testnet.vechain.org. You can request some free testnet VET and VTHO to play around with from the Vechain Faucet. [/fruitful_alert]
In this guide, we will look into all the features the Manager has to offer and how you can use it to manage your crypto assets.
1. Login to your Wallet
You can access the manager by visiting https://manager.vechainstats.com/ from any of the official Vechain Wallets:
- Sync – The official desktop wallet, which also supports Ledger Hardware wallets.
- VechainThor Mobile Wallet (Android / iOS) – The official mobile wallets.
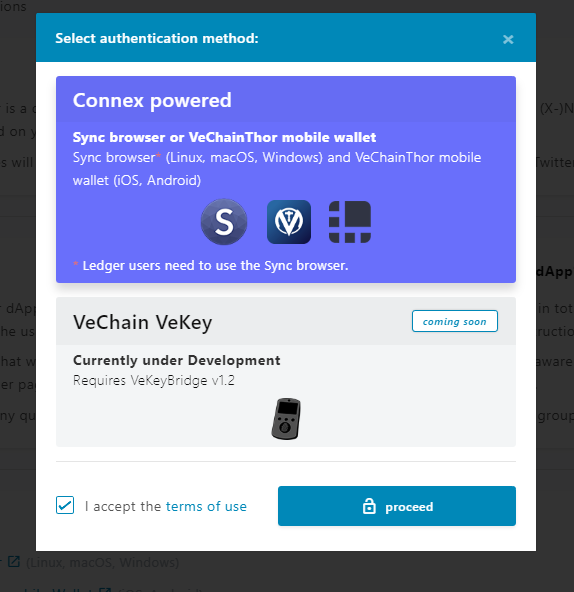
Click on Login / start dApp and click on proceed in the popup.
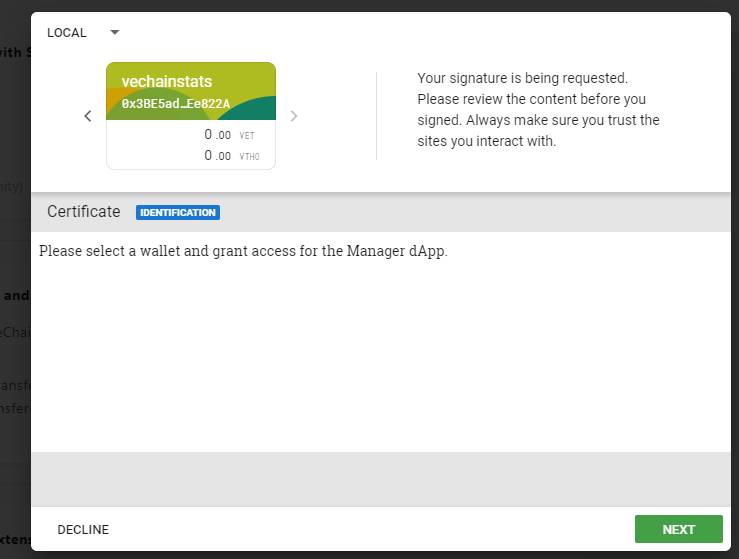
Here you select the address you want to manage, addresses managed by the official wallets, as well as addresses managed by your Ledger Nano wallet, are currently supported.
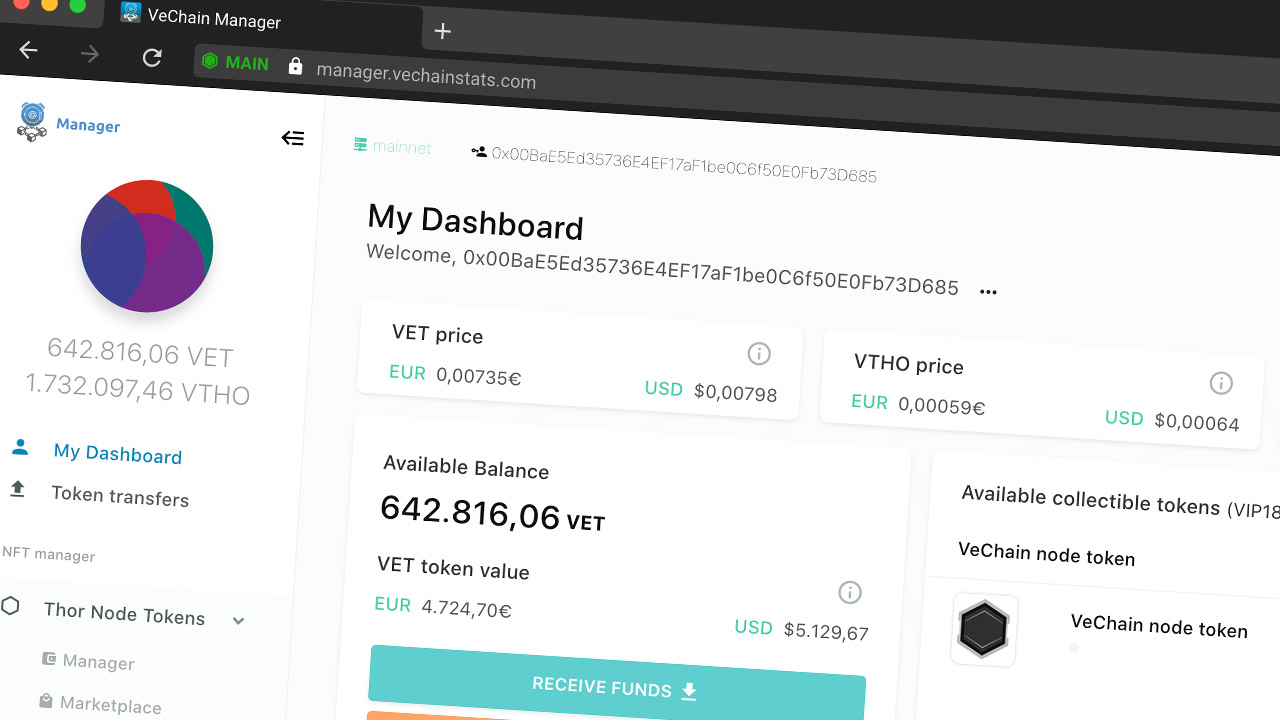
Once logged in on the dashboard you can see your assets:
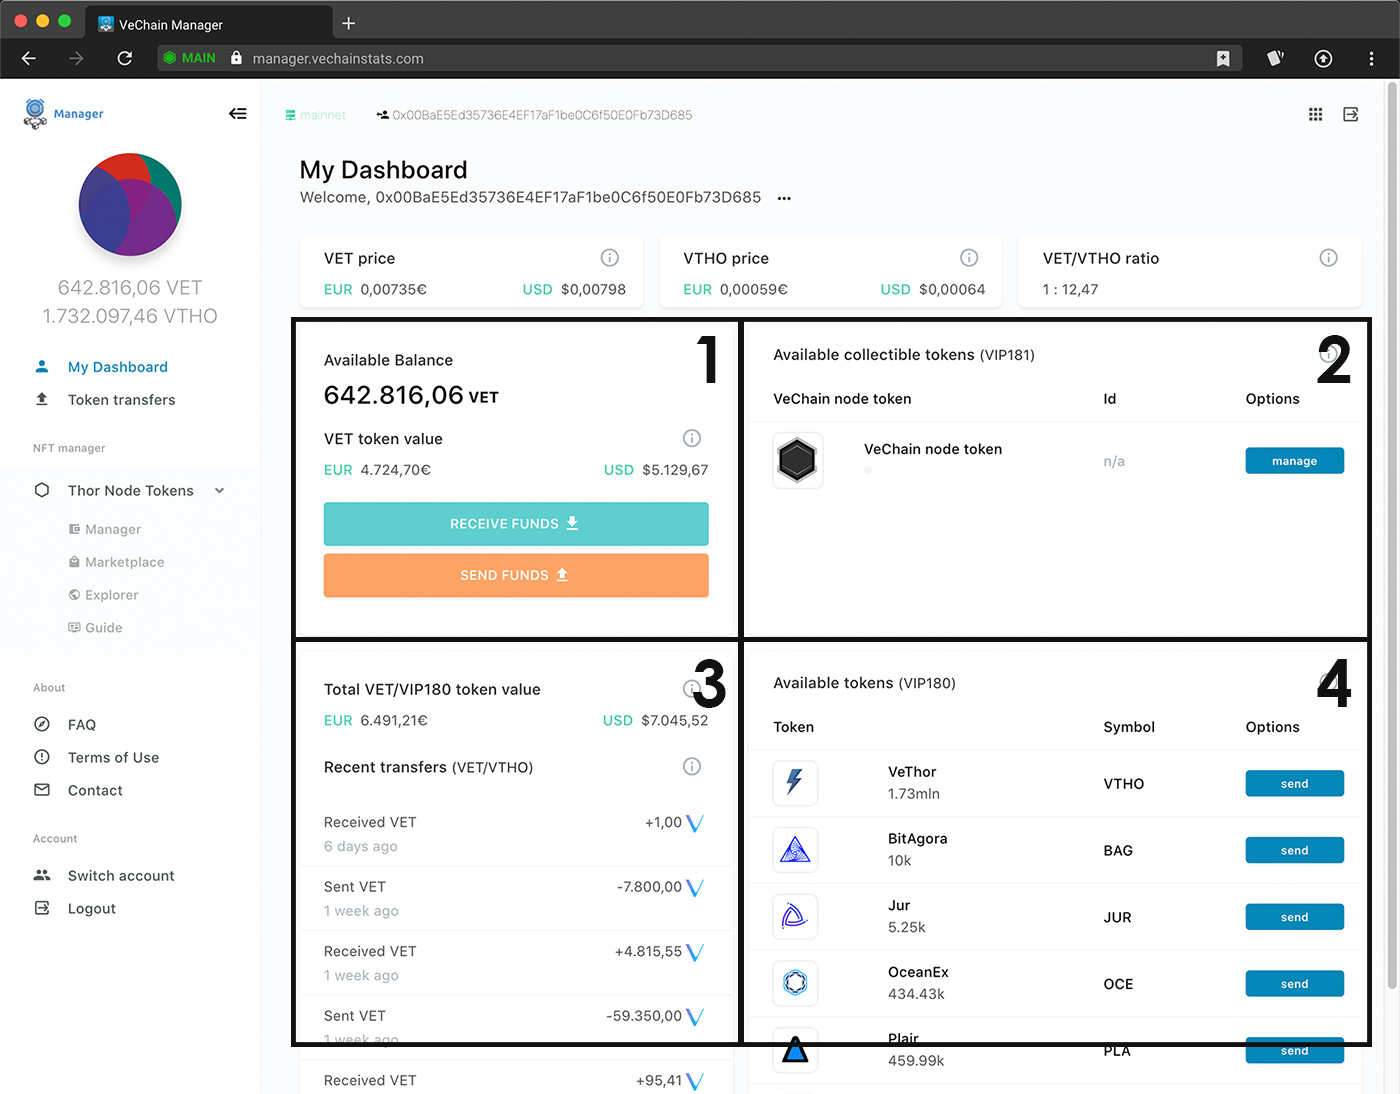
1.1. Available VET Balance
In the first area details of your VET holdings are displayed, you can also easily send or receive VET or VIP180 token by using the buttons in this area.
1.2. Available Collectible Tokens
Here you can see an overview of the VechainThor Node NTF Token (VIP181) that is currently in your address. If you have a Vechain Node it details will be displayed here.
Other collectible tokens will be supported in the near future.
Click here to learn more about Vechain Nodes
1.3. Total VET and VIP180 Token value
Here you can see the total value in both EUR as well as USD of VET and all other VIP180 tokens currently in your wallet. It also shows you any recent transfers of VET as well as VTHO.
1.4. Available Tokens
And finally, in the last section on the Dashboard you can find an overview of VIP180 Tokens that are currently in your wallet.
1.5 VTHO Generation
If you scroll further down you can see your current VTHO generation and VTHO bonus reward calculation as well as your recent VTHO claims (not included on the screenshot).
2. Sending VET and VechainThor VIP180 tokens
Sending VET or any of the VIP180 Tokens like Plair, Safe Haven, OceanEx or 8Hours is very straightforward using the Manager.
- First login to the manager with the address you want to send your tokens from as described in the section above.
- Select Token transfers from the menu on the left.
- Now a popup shows up that allows you to set all transaction details. Select the receiver, Token you want to transfer as well as the amount you want to send.
- Click on Send Funds.
- The Manager will now ask for you to sign the transaction, double-check to make sure you entered everything correctly and approve the transaction.[fruitful_alert color=”alert-warning”]
Warning for Ledger users
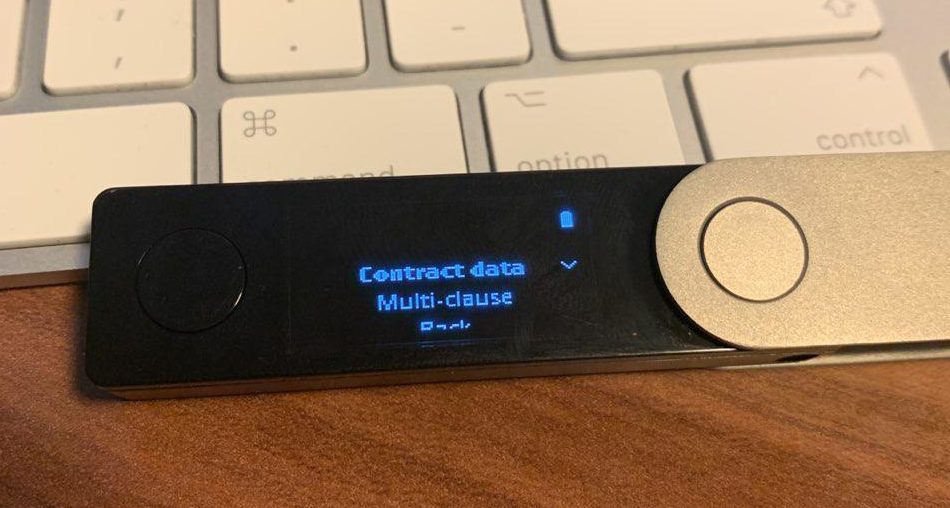 Make sure you have contract data and a multi clause set to yes on your Ledger. To do this open the Vechain app on your Ledger > Settings and change them there.[/fruitful_alert]
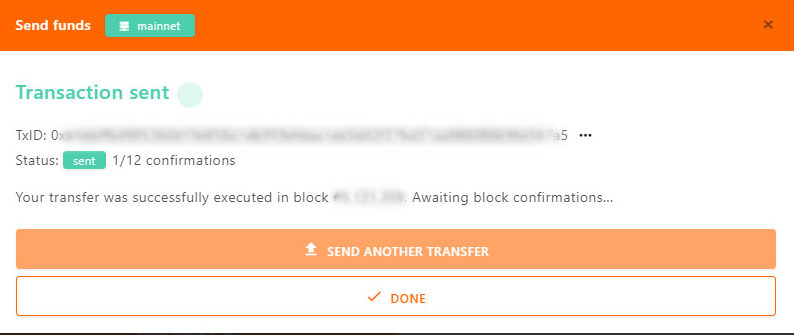
 - The Manager will now broadcast your transaction to the Blockchain, once it has been added in a block you will see its confirmation.
3. Manage your Nodes
One of the best features of the Manager is the various functions it has to manage your Vechain Node.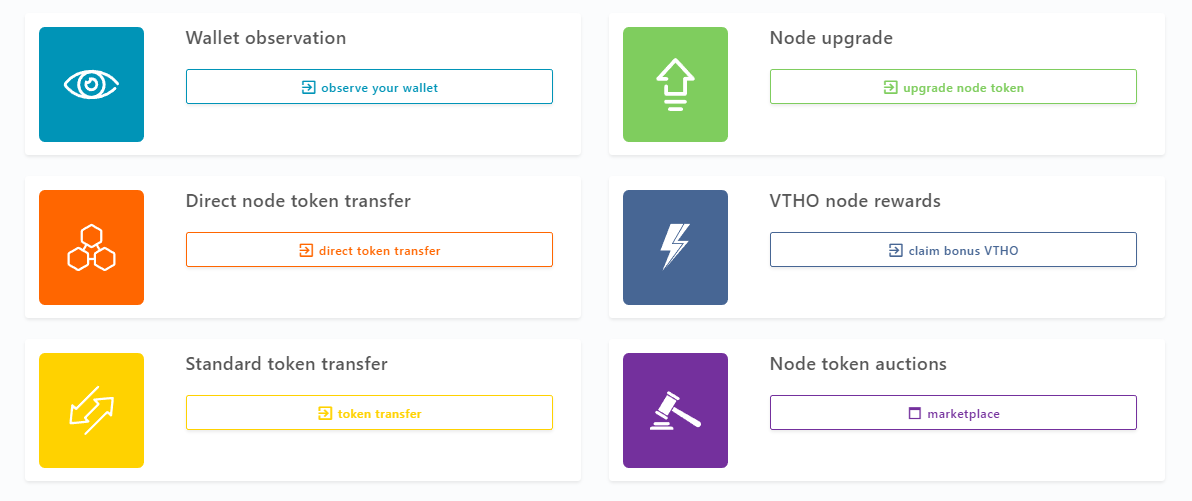 Below we have described the various functions you can perform using the Manager.
3.1 Buy a Node from the Marketplace
While you can still acquire an Economic Node by meeting the requirements (holding at least 1 million VET) and requesting an Upgrade to a Node (see the next section), X Nodes can only be acquired by buying them from the Node Marketplace.
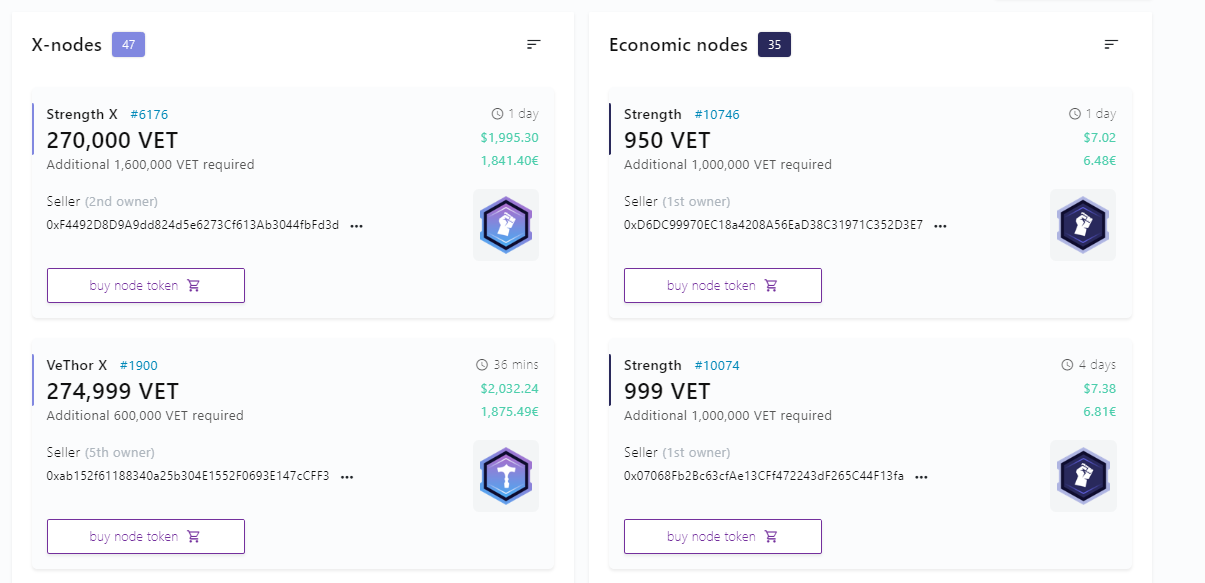
All Nodes up for sale can be found in the Marketplace which can be accessed from the Managers main menu.
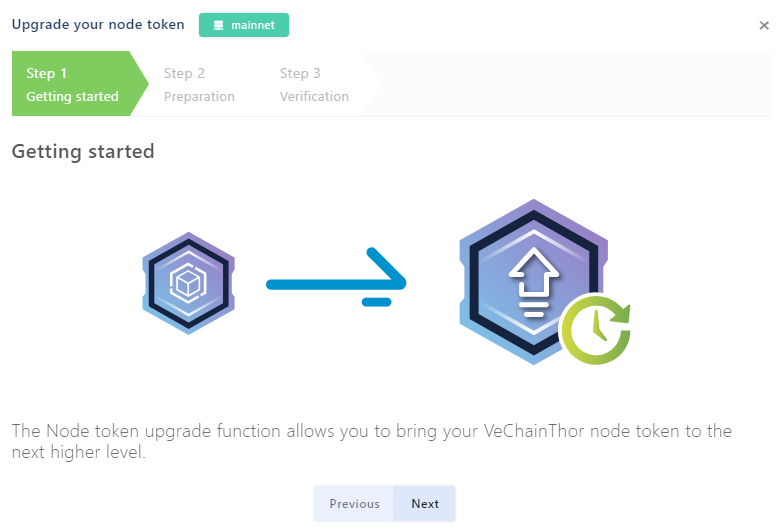
3.2 Upgrade a Node
Node owners can upgrade their Node to a higher level when they meet the requirements (a certain amount of VET). Click here to see all node levels and requirements.
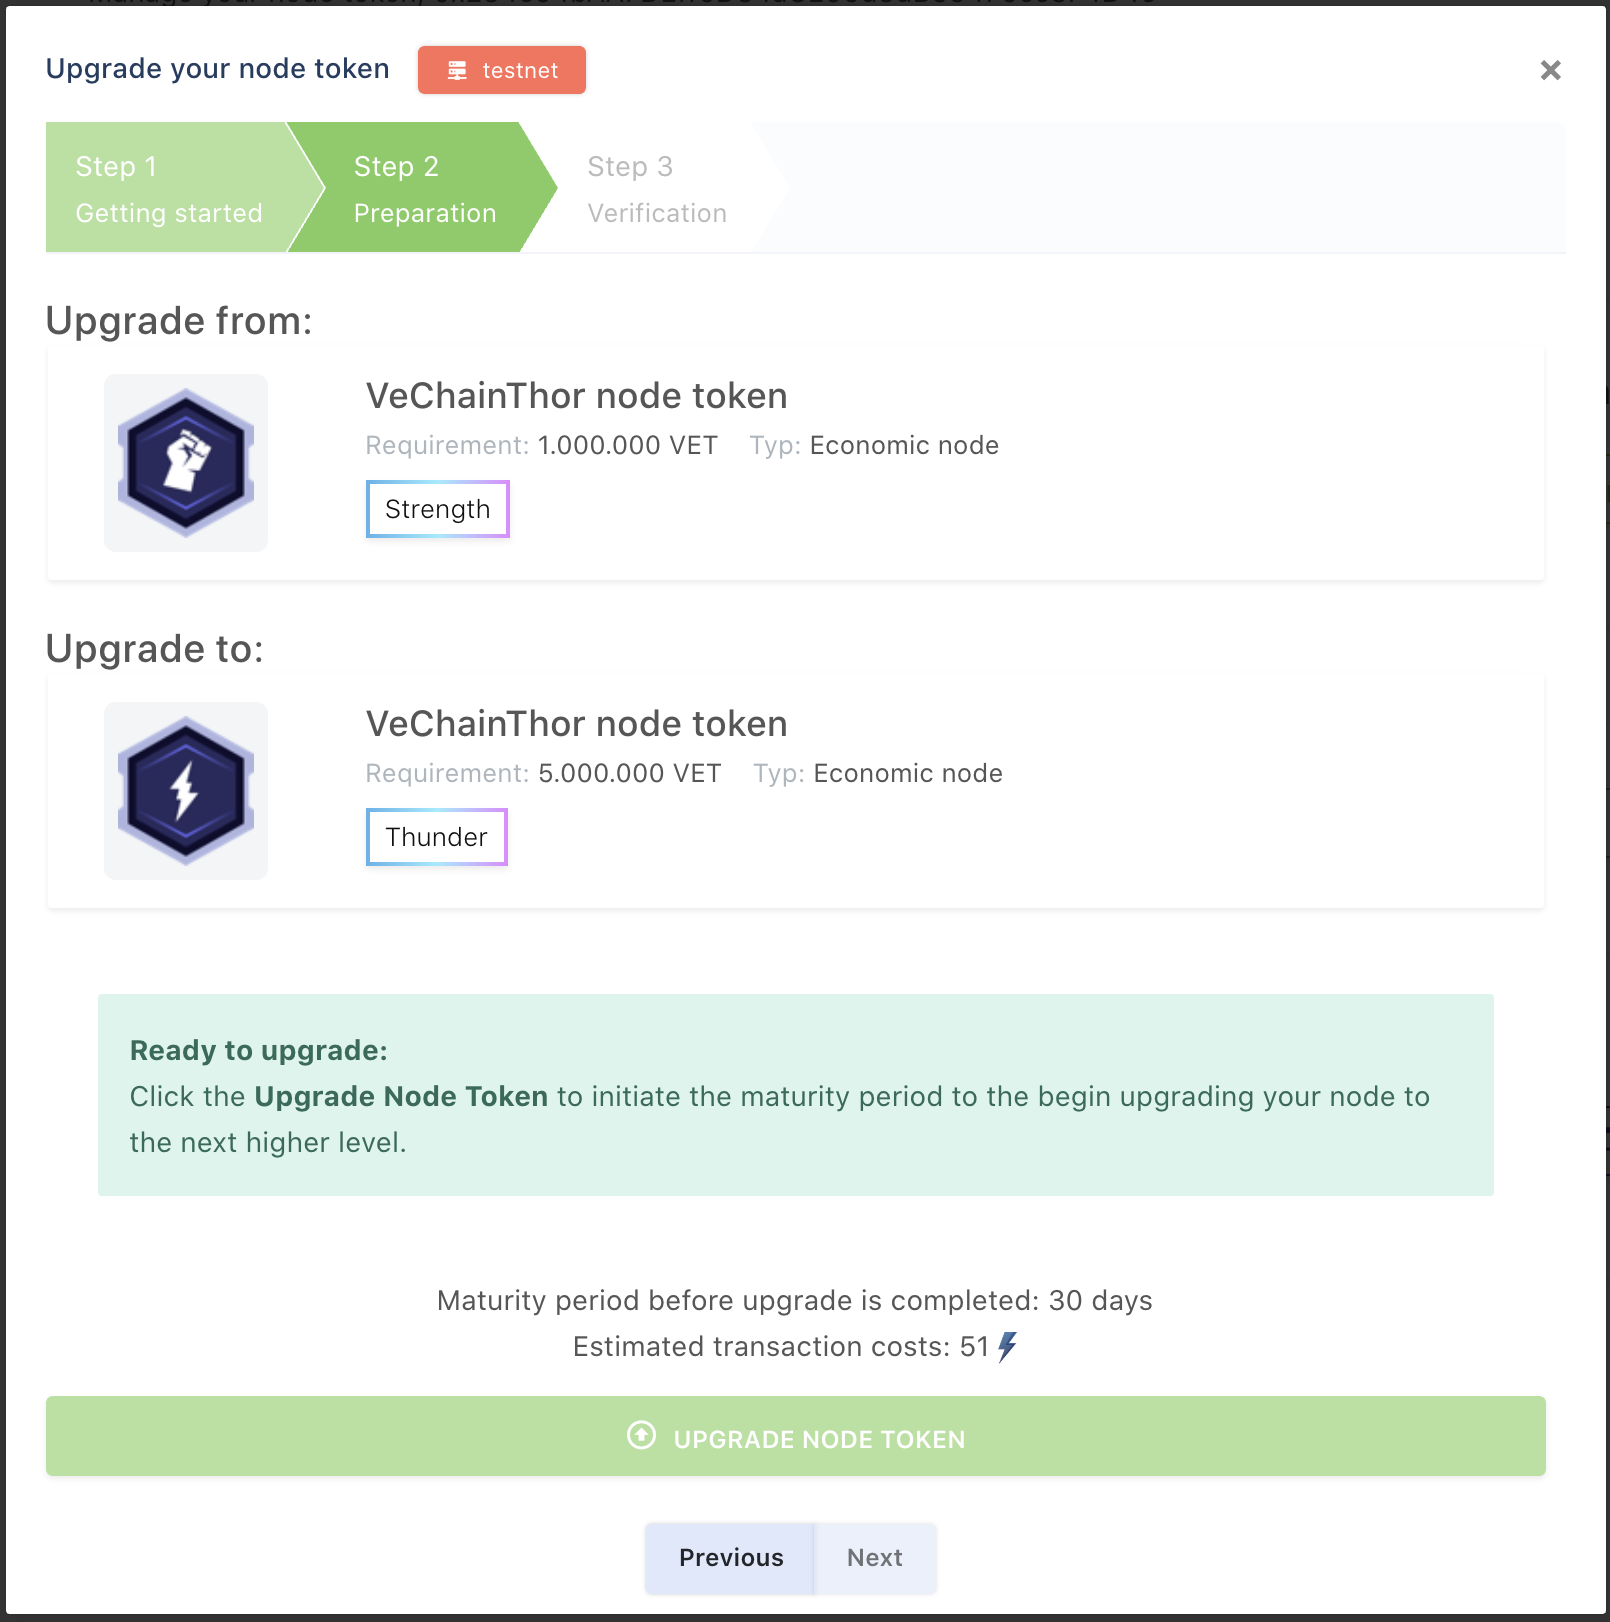
[fruitful_alert color=”alert-warning”]- You can never downgrade your Node, once you fall below the requirements of your Node tier, your Node token will get destroyed.
- Upgrading takes time, called the maturity period. After requesting the Upgrade you will have to wait this period before your Node is upgraded. Moving from a Strength Node to a Thunder Node takes 20 days, while upgrading from a Thunder X to a Mjolnir X Nodes takes as long as 90 days!
- Log in to the Manager using your wallet.
- Go to the Thor Node Manager.
- Click on Upgrade your Node Token and click on Next in step 1
- Sign the Transaction with your wallet to initiate the maturity period.
- Wait till the maturity period has finished and your Node will now be the next higher level.
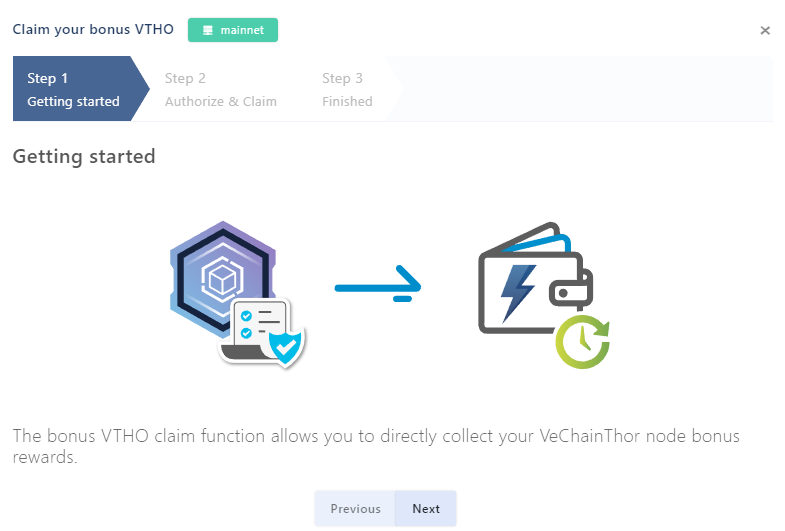
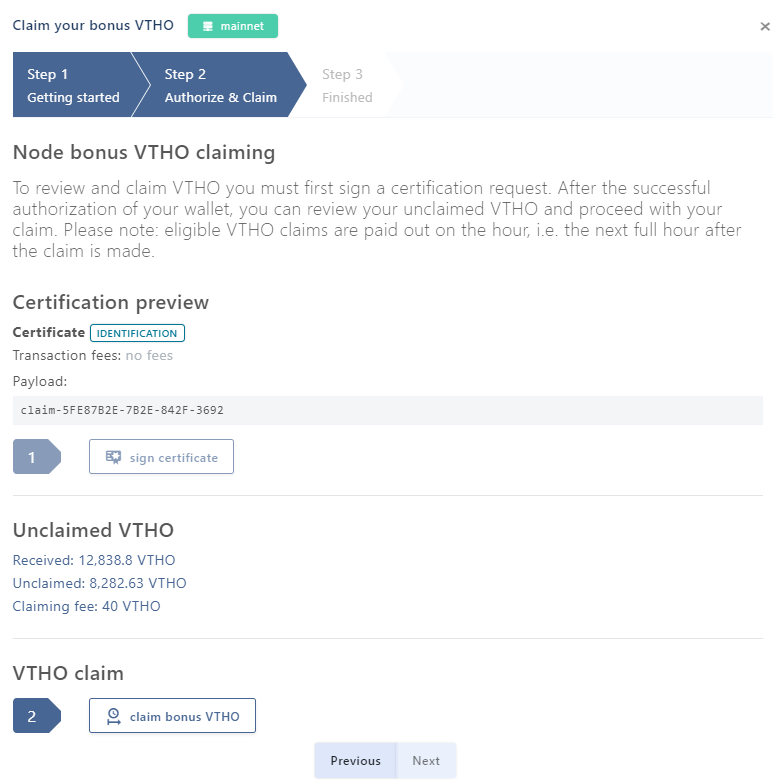
3.3 Claim VTHO rewards
Vechain Nodes get extra VTHO generated by a dedicated pool of VET set apart by the Foundation. This extra VTHO has to be claimed by the user, and this feature allows you to do exactly that.
- Log in to the Manager using your wallet.
- Go to the Thor Node Manager.
- Click on Claim bonus VTHO and click on Next in step 1
- In step two you first sign the certificate to identify your wallet, after which it will show you how much unclaimed VTHO you have:
- Finally, click on “Claim Bonus VTHO” and your request is sent to the smart contract. This contract pays out your unclaimed VTHO every hour.
3.4 Observe wallet
The observe wallet function allows you to observe another wallet (for example a wallet you have on your Sync or Ledger) from the official VechainThor mobile wallet.
This way you can still check your holdings, VTHO generation, and incoming/outgoing transactions while on the road. To send transactions, however, you will need access to the wallet that is being observed, adding another layer of security.

- Log in to the Manager using your wallet.
- Go to the Thor Node Manager.
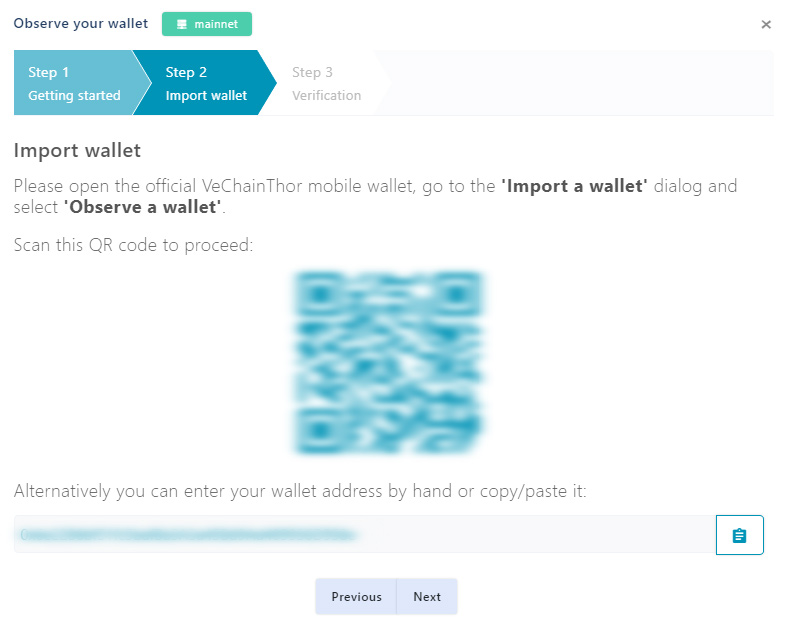
- Select Observe your Wallet.
- You will now get a QR code displaying the public address you want to observe, we need this QR code for our next step.
- Open the VechainThor mobile wallet on your mobile phone.
- Go to me > Manage Wallets > Import a wallet and select Observe a wallet.
- Scan the QR code, give the wallet a Name and accept the service agreement and privacy policy and click on Import.
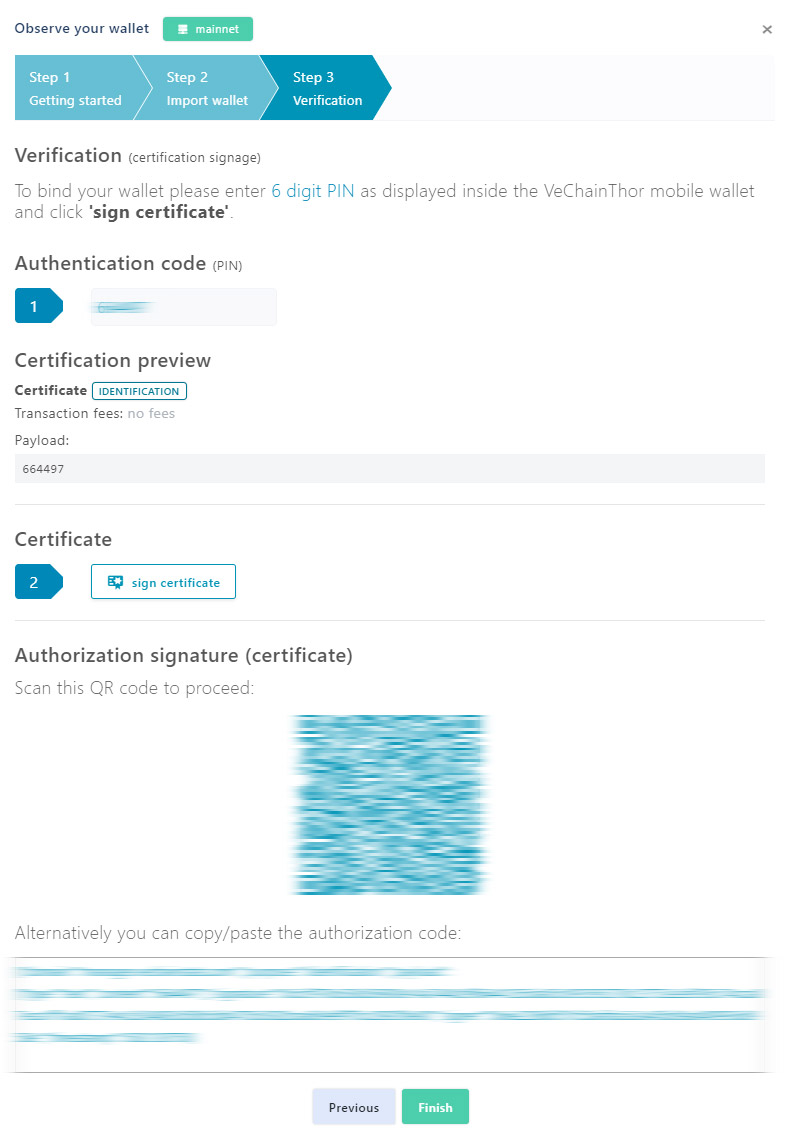
- You will now get a 6 digit authentication code on your mobile, add it to the Manager.
- Sign the certificate.
- Finally, you will get another QR code, scan the Authorization QR code with your mobile and click on Verify signature.
- Done! You will now be able to observe your wallet from your mobile!
3.5 Transfer Node
Node transfer description is coming soon once we have fully tested this feature ourselves!


")
Hello, i think that i saw you visited my site thus i came to ?return the favor?.I’m trying to find
things to enhance my site!I suppose its ok to use
some of your ideas!!
I’m truly enjoying the design and layout of your site. It’s a very easy on the eyes which makes it much more enjoyable for me to come here and visit more often. Did you hire out a developer to create your theme? Outstanding work!
Great wordpress blog here.. It’s hard to find quality writing like yours these days. I really appreciate people like you! take care
I truly enjoy looking through on this website , it contains superb posts.